- How Roles are Defined
- Defining Roles in the radius_roles_map Lookup
- Configuring Roles on the RADIUS Server
- Configuring IAS (Microsoft Internet Authentication Service)
How Roles are Defined
By default, successfully authenticated users are assigned the "user" role. However, this can be overridden several ways. Roles will be defined based on the first method which provides role information.
Roles will be defined using the following (in order of decreasing precedence):
- First, the app will check the radius_roles_map.csv lookup file for a entry
- Second, the app will try to find roles from the RADIUS server
- Finally, the app will use the default roles (defined in the setup screen)
Note: if the account is associated with a local account on the host, then this account will be used (Splunk will not attempt to use scripted authentication if the user has an account on the local system).
Defining Roles in the radius_roles_map Lookup
Roles can be defined in a lookup file. These roles will taken over roles from the RADIUS server and thus can be used to define roles even when the roles are not defined on the server.
To define the roles in the lookup file, edit the file at $SPLUNK_HOME\etc\apps\radius_auth\lookups\radius_roles_map.csv with the username followed by the roles in a colon separated list. Below is an example:
username,roles
johndoe,user
janedoe,user:admin:power
You can view the file by running the following search:
| inputlookup append=t radius_roles_map
Configuring Roles on the RADIUS Server
By default, successfully authenticated users are assigned the "user" role. However, this can be overridden by creating a vendor specific attribute on the RADIUS server. The attribute should contain a string containing a colon or comma separated list of roles (like "admin:can_delete"). Re-run setup on the RADIUS auth app and configure the app to use the vendor code and vendor attribute ID you defined.
If you are not sure what the attribute ID and vendor code being provided by the server is, run the following search after authenticating to see what attributes the app is receiving:
index=_internal "Received the following fields upon login" sourcetype="radius_auth"Configuring IAS (Microsoft Internet Authentication Service)
Below are instructions for configuring IAS.
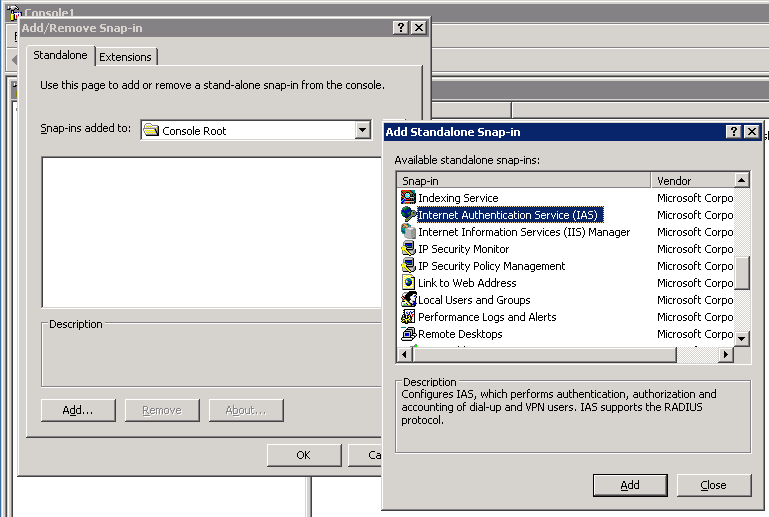
Open the IAS MMC Snap-In
Start the "mmc"
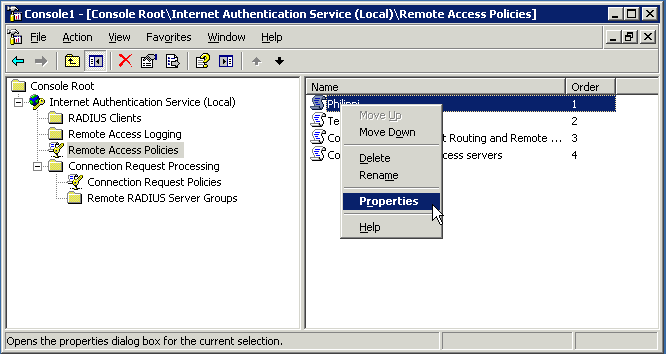
Open the Remote Access Policy
Selected "Remote Access Policies" and open the appropriate policy. Then press the "Edit Profile" button and then click the "Advanced" tab.
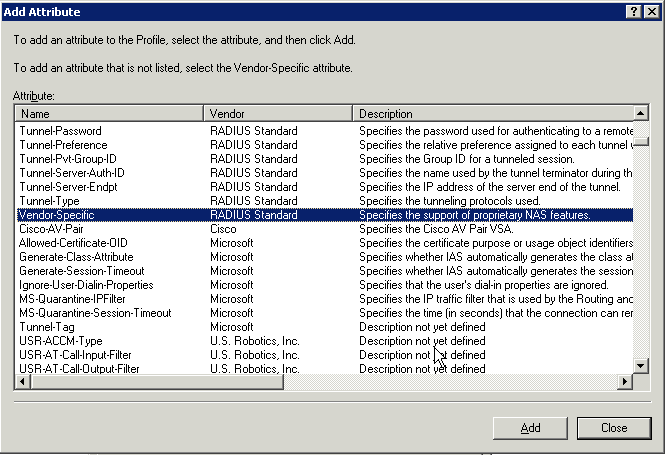
Create a New Attribute
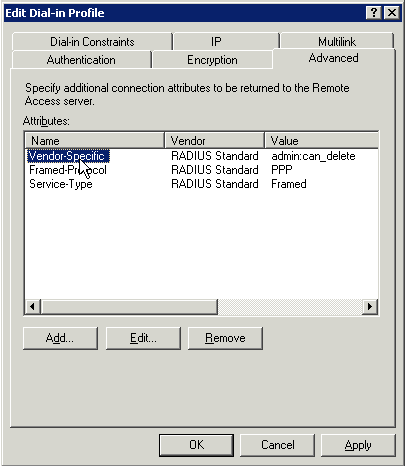
Press the "Add" button and create a new attribute with a name of "Vendor-Specific" and a vendor of "RADIUS Standard".
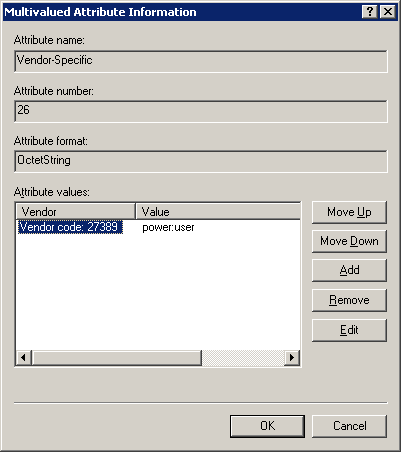
Press "Add" under the list of attribute values. Set the vendor code to 27389 and click the radio button for "Yes. It conforms".
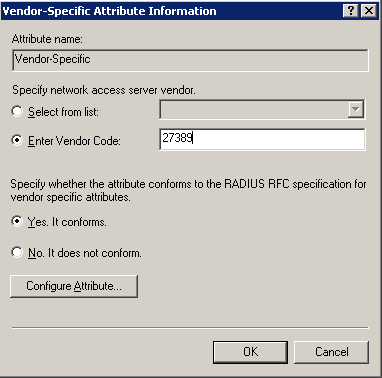
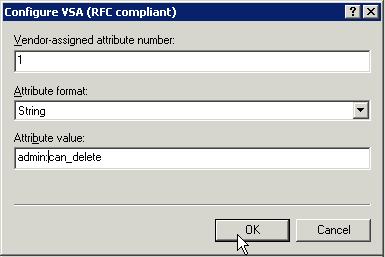
Click "Configure Attribute" to edit the value. Set the "Vendor assigned attribute number" to 1. Select a format of string and set the value to a colon separated list of roles.
The created attribute should look something like this: